
You probably know a little about what routers do, but you’re not very familiar with how to operate one, or how to operate QtVLM in specific. I will explain the most important controls, and describe how you can do a basic routing. I assume you have already installed QtVLM.
Set up
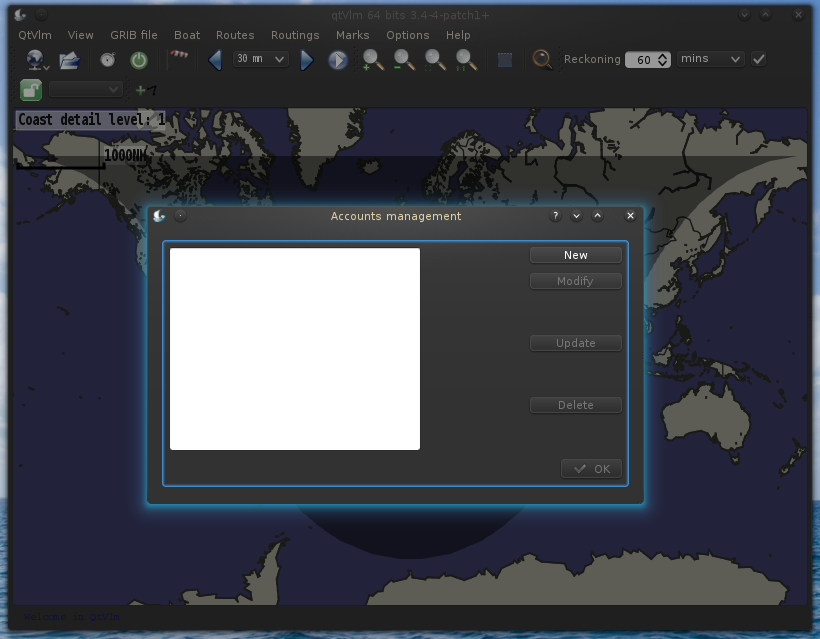
When you run QtVLM the first time, the language should be changed to English (unless you prefer French or Spanish). QtVLM also asks for boat information. Select “real boat”, because QtVLM cannot natively communicate with sailonline, so as far as QtVLM knows, we’re sailing on a real boat!
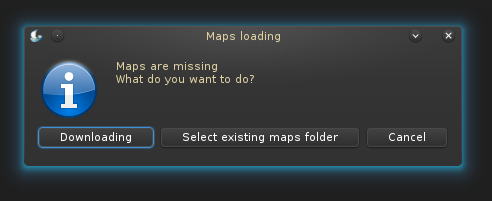
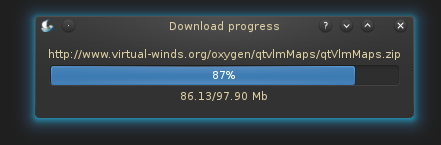
It is possible that QtVLM asks you to download a world map, this should be self explanatory.
Setting the polar
This is assuming you don’t yet have the polar file. If you already have the polar file, my can skip a few steps, but it doesn’t do any harm to follow every step regardless of whether you already have the file or not.
- Download the QtVLM polar from brainaid
- Save the polar file in the “polar” folder of your QtVLM install. In windows this is probably C:/Program Files/qtVlm/polar/
- (Re)start QtVLM
- Select from the menu: Boat -> Boat(s) settings
- A window pops up. At the bottom section, there is a dropdown with all polar files in the “polar” folder.
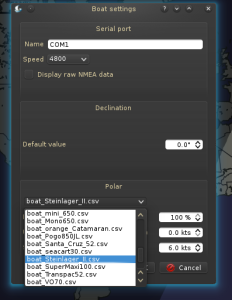
Select a polar - Select the polar you just downloaded from the dropdown menu.
- You can set other settings in this window, like efficiency. If you already know you won’t be able to sail perfect, you can route with 98% or 95% efficiency, so the router won’t assume you’re sailing at full speed.
- Click OK

You won’t notice anything different, but you can check whether QtVLM has correctly set the polar by opening the same window again: Boat -> Boat(s) settings, if all went OK, your polar is still selected.
The GRIB file
- Get the grib from brainaid or from some other source. It does not matter where you save the file, as long as you remember where it is, it’s fine.
- In qtVLM, click in the menu: GRIB file -> Open
- A file chooser window pops up. Browse to the GRIB file you want to open, and open it.
- You will notice that part of the map is now coloured with wind information. You may need to zoom in/out, or move around the map to see it.

The GRIB data is displayed.

Marks
There are several ways to place a waypoint:
- Via the menu: Marks -> Add a mark. Here you can set the exact coordinates of the mark, you can also set a name of the mark.
- Right click a location on the map, and select “Place a new mark”. Now the coordinates are already filled in, but you have the option to adjust them a bit to get them in the exact right place, you can also set a name for the mark.
- Double click on a location on the map, the mark is placed where your mouse is. Your mark is named “POI” by default.

Adding and editing a mark
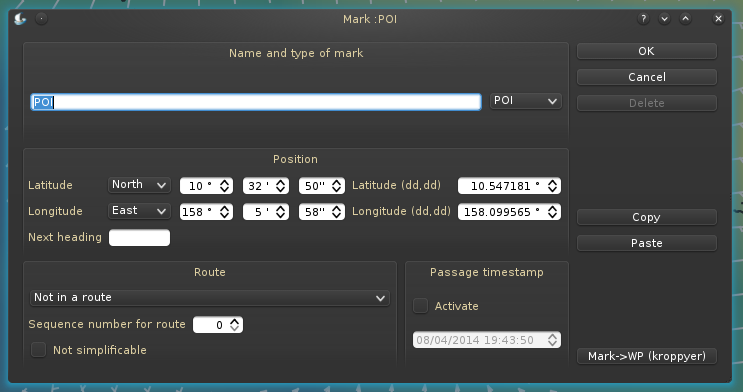
Once your mark in on the map, you have at least two way to move and/or rename the mark:
- Right click on the mark (may need some aiming), and select “edit”.
- Hold shift and drag the mark around (might need some aiming).
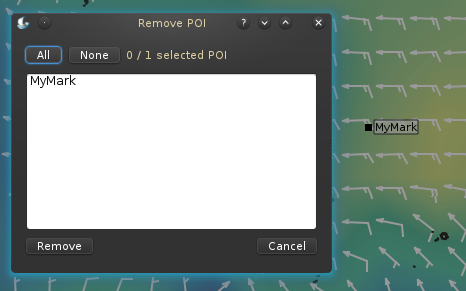
Removing the mark can be done in several ways as well:
- Right click on the mark, select “delete”.
- Via the menu: Marks -> delete marks, select the mark(s) you want to delete, and click “delete”.

Delete a mark
Boat position
Your boat is a special mark. You can’t delete it, and there’s only one of it. You can move it:
- Using shift+drag, just like marks.
- Click the button “move boat” on the left of the window. In this window you can set the exact coordinates of your boat. Only use the left set of input fields to edit your position, all changes right two fields (dd.dd⁰ format) are ignored.
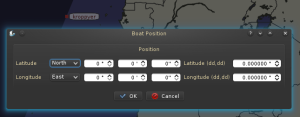
Move your boat by entering coordinates - You can change the format of the left field by selecting “Units” from the “Options”-menu (after closing the “move boat” window).
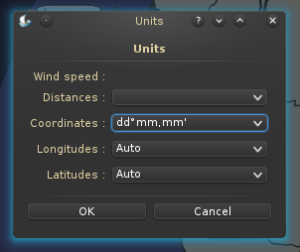
Select how to display number in QtVLM 
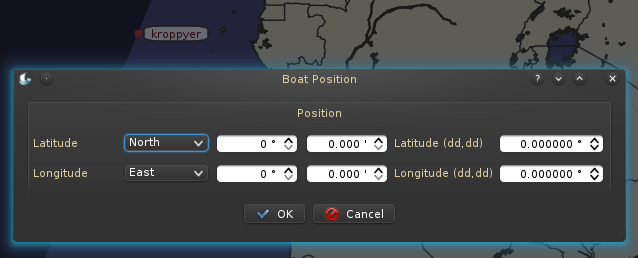
Move your boat by entering its coordinates in dd⁰mm.mmm’ format this time.
- You can change the format of the left field by selecting “Units” from the “Options”-menu (after closing the “move boat” window).
- Right click your boat (red mark in the map), and select “Set-up position”


It is also possible to link your boat position with the live data from sail online, so that it moves automatically, but that’s somewhat complicated to cover in an introduction to QtVLM.
Routing in QtVLM
Now you are able to set up all information needed to make a simple routing. QtVLM does not support marks halfway a routing, it is purely “start here, end here”. You can set up barriers so simulate marks, but it’s still not perfect.
QtVLM knows “routes” and “routings”. A route is simple, a single route from one point to another. It’s basically a series of waypoints between the start- and finishpoint. A routing is a set of isochrones between the start- and endpoint. You can’t use the routing directly, it has to be converted to a route first. To make an optimal route, you have to make a routing first, and convert that into a route.
Create a routing
QtVLM routes with steps in time. it takes your starting position, and then draws its first isochrone: where can I get in x minutes, and then continues that, until it reached the target.
- Click menu: Routings -> Create a routing
- A window pops up.
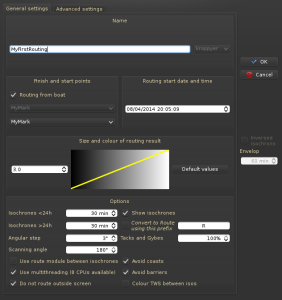
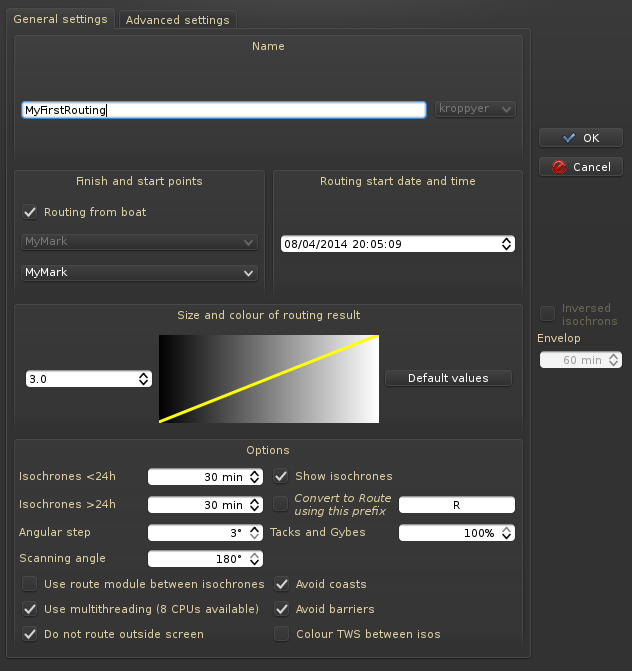
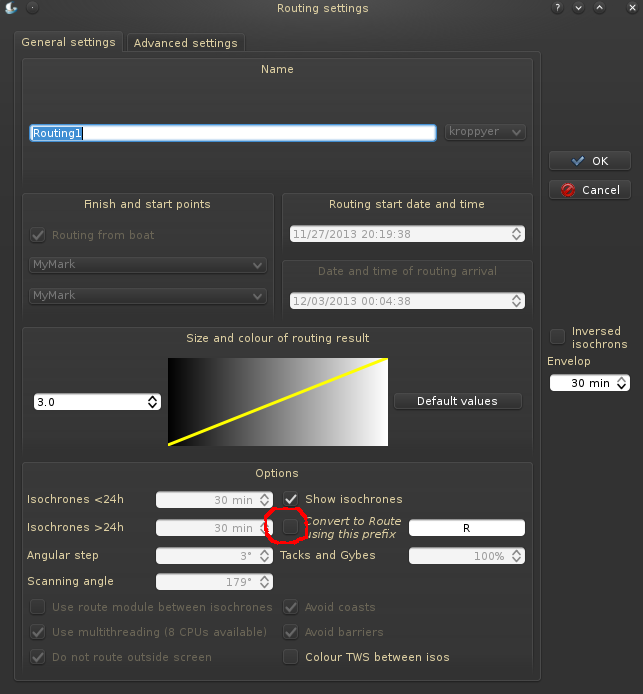
Create a routing - Name your route however you want.
- Select from where to route, and where to in the section “finish and start points”. You can route from your boat, or from a mark.
- Select a start time in the section “Routing start data and time”. Default value is the current time. Note, notation is “mm/dd/yyyy hh:mm:ss”, but the program will help you prevent entering wrong dates.
- Check the settings in the section “Options”:
- Isochrones 24h (steps in time after the first 24 hours), use something like 60 minutes
- Angular step, use the smallest possible value (3 degrees), unless it slows down your computer a lot.
- Scanning angle: use the largest possible value (179 or 180).
- Make sure “Use multithreading” is selected, it will speed up the process.
- Make sure “Avoid coasts” is selected, your boat doesn’t have wheels.
- I recommend you to have “show isochrones” checked
- Do not check “Convert to Route using prefix” (this will automatically make the route before you can check the isochrones and make adjustments)
- You can set “Tack and Gybes” to something like 90%. I do not yet know what values will match with sol’s performance loss, but at least the router know that tacking/gybing will slow you down.
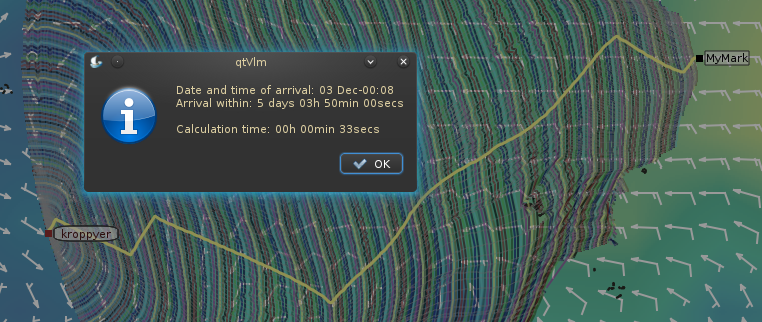
- Click “OK” (on the right), the program starts routing. To cancel the routing process, press the “Esc” key.
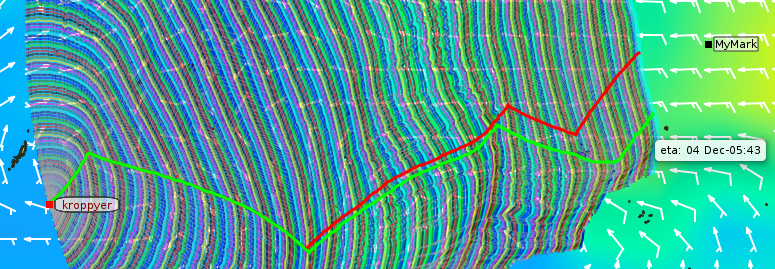
- Once the routing is finished, a messages appears the date and time of arrival. Click OK.

Routing finished. - You can now check the result of the routing, inspect the isochrones, and move your mouse over the isochrones to see routes to other points than the mark you selected as target. If you’re pleased with the routing you can convert it into a route (see the section “Convert the routing to a route” below), if not, you can delete the routing and reroute (using other settings, other grib, other polar), or you can edit a bit in the current routing.
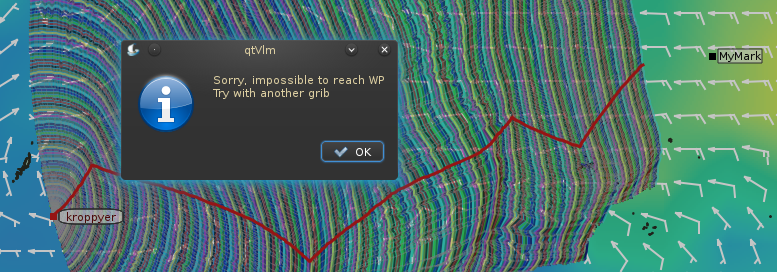
It often happens (in ocean races) that your WP is so far away that it takes more than 7 days to get there. If you’re GRIB file only predicts winds for 7 days, the routing will stop after 7 days. This is where the router can’t help you, it is where you need to help the router.
There are two options, both basically do the same. You can create an intermediate WP and route to the way point. Question is, where do I place the waypoint? You can use the current routing to help you decide on a good intermediate WP.
Another option is to create a pivot point somewhere at the lest isochrone. There is a lot more you can do with pivot points, but I’ll save that for a later blog post (doesn’t mean you shouldn’t try to do more things with them!).
To create a pivot point, right click where you want the pivot point to be (see image below) and select “create pivot point” (or “Create pivot point changing the routing option” if you want to try things).
QtVLM has a think a bit about pivot points, be patient. After a few moments it starts to route from the pivot point to your original destination, and surprise surprise you can’t get there before the GRIB stops.
What’s the point? Well, you created a new routing without rerouting. If you check your routings, you’ll see there is a new one. You can edit the original one, and make the isochrones visible again, and create a new pivot point. This way you can make multiple routings without much rerouting.
Delete a routing
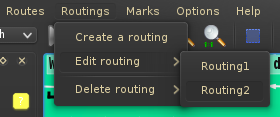
- Click menu: Routings -> Delete routing -> [your routing]
- Confirm
Edit a routing
The can edit some of the routing options via the menu: Routings -> Edit routing -> [your routing]
Another edit you can make is to create a pivot point in the routing. This is not really an edit of the routing, but it makes a new one based on the current routing. I explained how to use a pivot point if your destination is out of reach. I will explain how to use pivot point in other ways in a later post.
Convert the routing to a route
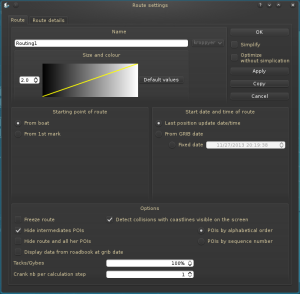
- Click menu: Routings -> Edit routing -> [your routing]

Check the “Convert to route using prefix”-checkbox to convert your routing into a route. - check the checkbox “Convert to route using prefix” and click “OK”
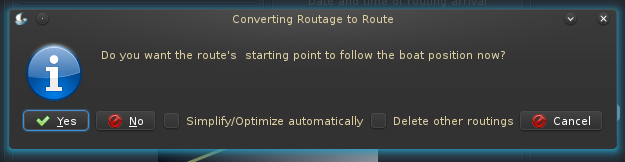
- A window pops up with some extra options:
- “Simplify/Optimize automatically”, you can do this later as well. Experiment with it.
- Delete other routings. I usually don’t use this option.
- The question the pop up box asks is “Do you want the route’s starting point to follow the boat position now?”. I usually click no. What it means is that, when you move the boat, QtVLM tries to change the route such that your boat is still the starting point.

Options for converting your routing to a route.
After a few seconds, the isochrones disappear and the route has been created. If you selected the simplify/optimize option, you’re see QtVLM moving some of the waypoints around, trying to optimize.
You can now edit the route to view the courses to sail, or to change some settings.
Edit a route
- Click menu: Routes -> Edit route -> [your route]
Edit your route. - You can choose here for simplify only, or optimize only (or select both), then click apply.
- You can “freeze” the route, which means, the route will stay as it is when you open another grib (until you close QtVLM again). If you do not freeze your route and open another grib, QtVLM will recalculate all TWA/TWS/SOG at every WP along the route, changing the ETA, and resulting in almost useless route information.
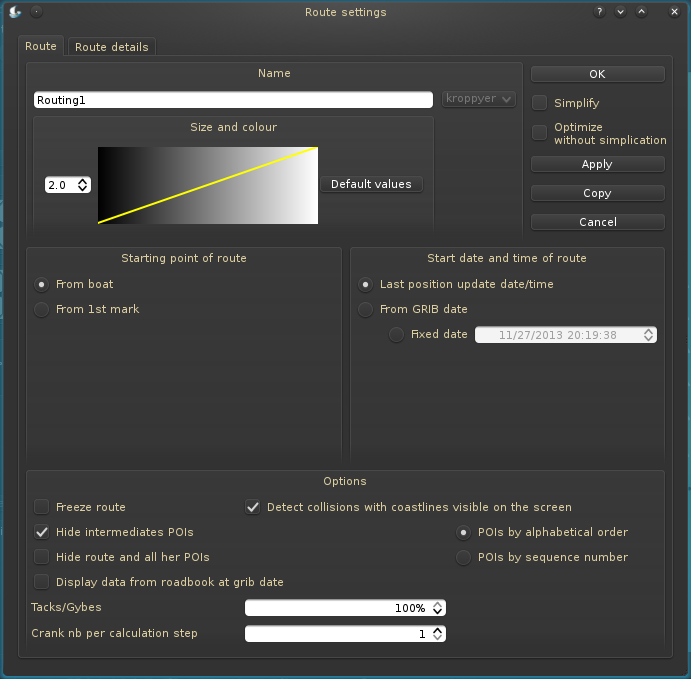
In this edit window there is a tab (at the top) called “Route details”, where your complete route with intermediate WPs, TWAs, COGs, SOGs, etc, etc.. You can export this table to a .csv file, which you can open with programs like excel and LibreOffice. With this data you can set your DCs (if you decide to follow your router).
A final word
You are now read to create routings in QtVLM for most basic ocean races. You can extract the necessary data from the route to set DCs in sailonline. Some situations require some more knowledge about QtVLM to handle efficiently. I will post about that later.
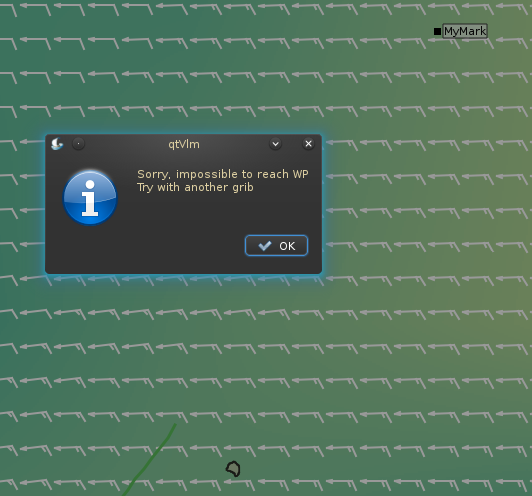
You might get a message “Sorry, impossible to reach WP. Try with another GRIB” while you’re sure it should be possible. In that case your start or end point is probably too close to shore. You can first try to route again with other intervals between the isochrones, but if that doesn’t work, you need to move your start or endpoint more offshore.
I only talked about how to use QtVLM. Though that is an important part of routing, the most important part is interpreting the results of your routing, and making decisions based on that. Races are not won by blindly following a router. Well… not often.
When you think you got it all, surprise, surprise, you found one of the best manuals for entering quickly on qTVlm. Thank you kroppyer.
Now, just two comments.
“Create a routing”, Points 4.8 and 5.
Normally I use the minimal value found between the SOL Loss of Performance (SLP) for tacks and for gybes, i. e., “%” = min (SLPTacks ; SLPGybes).
If the race is biased to, let’s say, more tacks than gybes, I choose that value (SLPTacks) for the qTVlm input.
After the “Ok” for start the program routing, if I want to stop it I just click on the “Esc” key (for Windows). If don’t stops immediately give a second one till it appears a message saying “Routing stopped by user”.
Thank you! I added the “Esc” key to the post.
Very nice primer for getting started with QTVLM, thank you. I found your documentation while searching for information on problems with the QTVLM routing feature. I am wondering if anyone else might be experiencing failure of the sytem to draw isochrones after initiating routing. The feature works brilliantly on my Windows 7 desktop, but fails on my Lenovo Miix 2 windows 8.1 tablet. Thought it might be a Windows 8.1 compatibility issue, but can’t find any concrete OS system requirement information that would point to the OS as the culprit.
I can think of three things:
– You might have unchecked “show isochrones” in the routing options.
– Do you get the message “Sorry, impossible to reach WP. Try with another GRIB”? Then play a bit with the time interval between isochrones, and the start position.
– Do the isochrones disappear directly after the routing is done, leaving only the route, not the routing? Then you probably have checked “convert to route using prefix” routing option.
Thanks for the guide. One question; I am trying to download a grib but keep getting an error mssg that says I have to select a zone on the map before I send the request. How do I select a zone?
You can hold shift while dragging, or you can click the selection button in the toolbar (blue square, just to the right of the zoom buttons) and drag without holding shift.
Just a question: is it possible to routing with wind gribs and also tidal stream grib at the same time?
I have find tidal stream grib here: http://www.weather4d.com/MyOcean/
For example sailing the british channel by france to england tidal stream is very importat is it not safe to forget it…
thanks a lot
bye
I am not aware of any option to include tidal information in the routing in QtVLM, sadly…
qtVlm accept 2 GRIB files at the same time … weather forecast & tidal stream
Regards,
Phille
Paolo at QtVLM wiki page i have found this about curents.
i have not give it a propper look yet so check if it is valid for you
http://wiki.virtual-loup-de-mer.org/index.php/Afficher_un_fichier_Courant_ou_Vagues
You can load a wind grib and a tidal (currents) grib at the same time (grib->open a currents grib), and route/routing modules will take it into account in their calculations. That option is not available in VLM boat mode (only real boat mode) to avoid confusion.
Cheers
Philippe.
I know this is a Introduction. I wanted to do a multipoint route (a route passiong through two points). How can I do that?
Thanks!
You can use pivot points for that (i.e route towards the first point, do not convert to route, create a pivot with options change and specify the second POI as a target).
Pretty! This was an extremely wonderful article. Thank
you for providing this information.
Latest version of QTVlm is 5.2.5 Patch 1
Read my guide here:
http://www.sailonline.org/board/thread/13259/qtlvm-router/?page=2#post-13979
When simplifying and optimising a Routing to a Route QtVLM often crashes. I have found that stopping GPS during that process seems to stop such crashes.
Never had this issue before, but now I’m stuck. In addition to the instruments at the bottom, I now have dials all over the place. How do I get rid of them??